
Below discusses the reviewing and changing of the settings of a Delimited file of a new Import. Scroll down for instructions for a Database Connection.
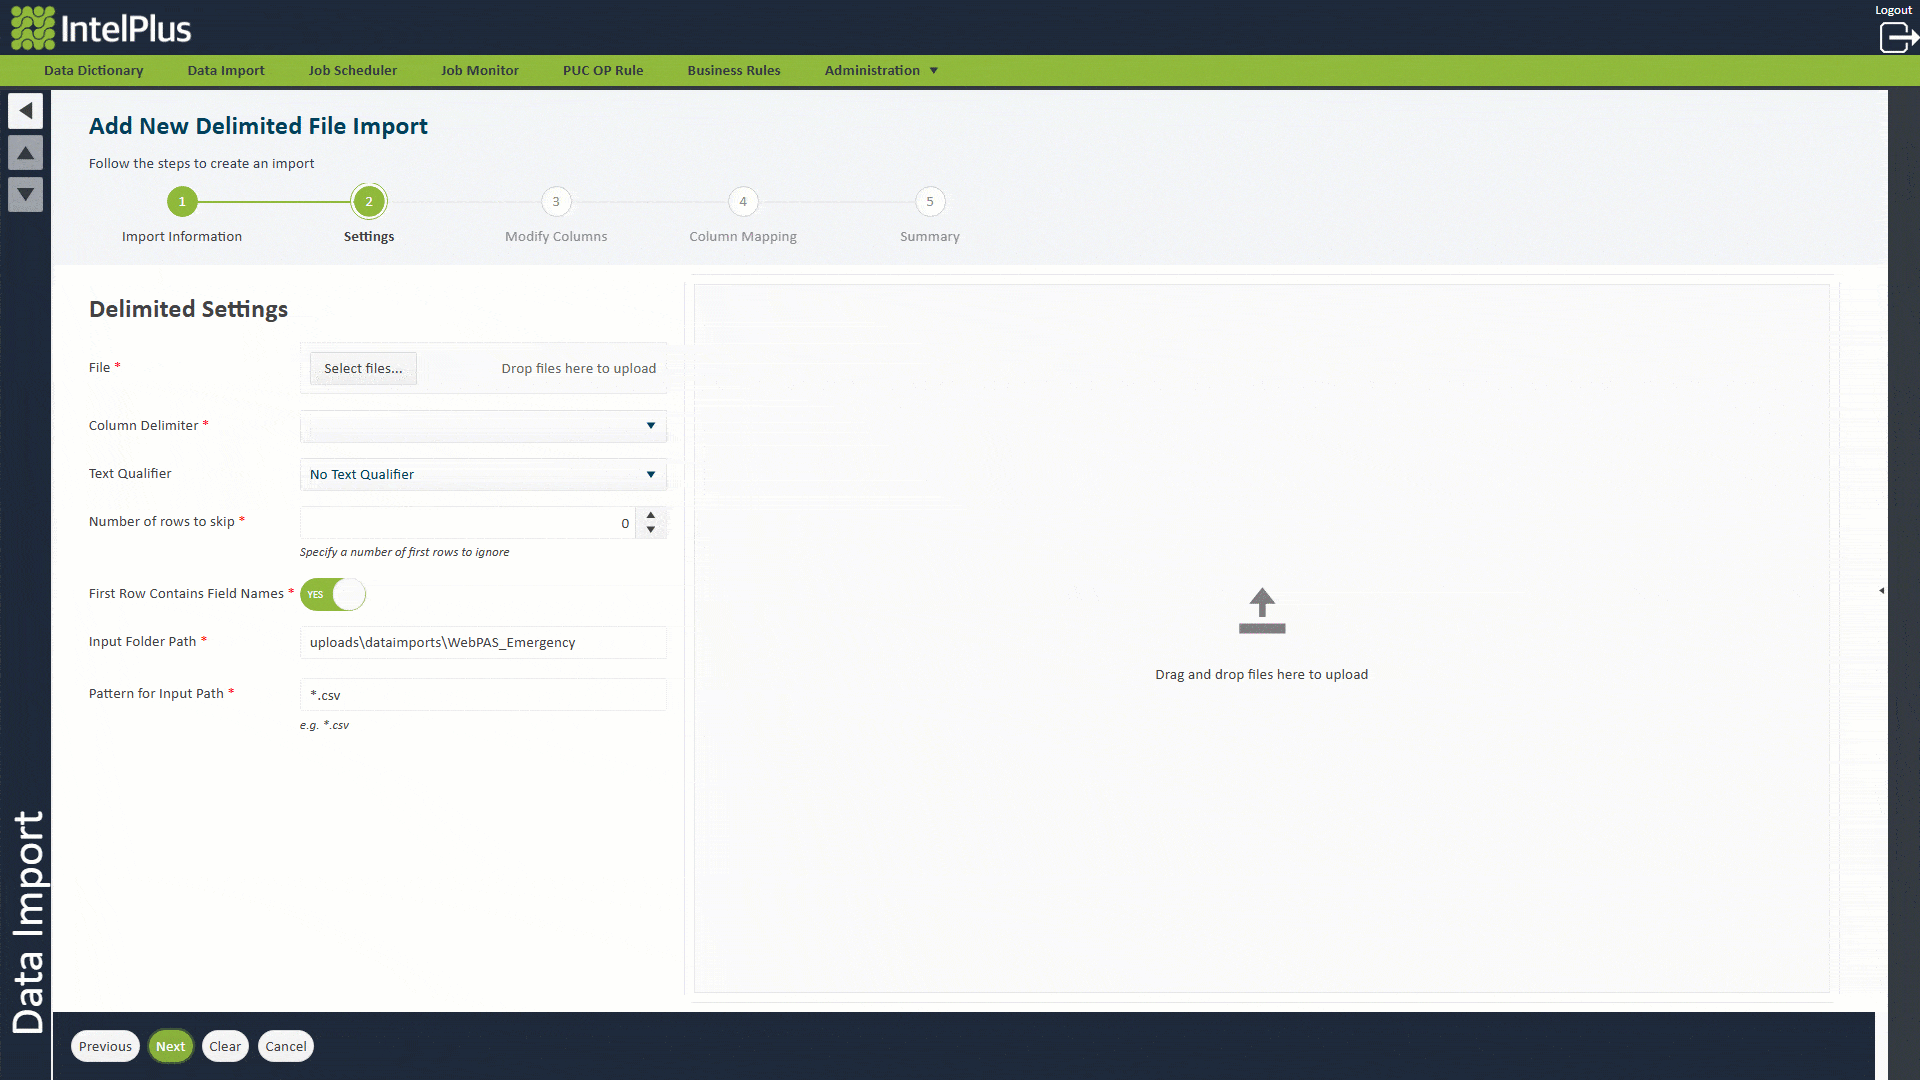
- Upload the Delimited source file by either:
a. Dragging and dropping the sample file, or
b. Clicking Select Files and navigate to the file location and select the file
Best Practice
- If the file is greater than 10MB, reduce it to a sample. This will provide better performance in the app.
- Large files (greater than 200MB) can later be placed in the Import folder location for processing.
- Once the file is uploaded, the first 50 rows are displayed for you to review the settings. A change in any of the following settings will reflect in the pre-viewer.
a. Column Delimiter
b. Text Qualifier
c. Number of Rows to Skip (if there are rows before the source data)
d. First Row Contains Field Names
3. Input Folder Path is defaulted to your root location and will create a new folder using the Import Code. You can change this location if required.
4. If the location will have data for other imports, use the Pattern for Input Path to set a mask for valid files by name and file type (e.g. “Facility1*.csv”).
The image below illustrates the above points.
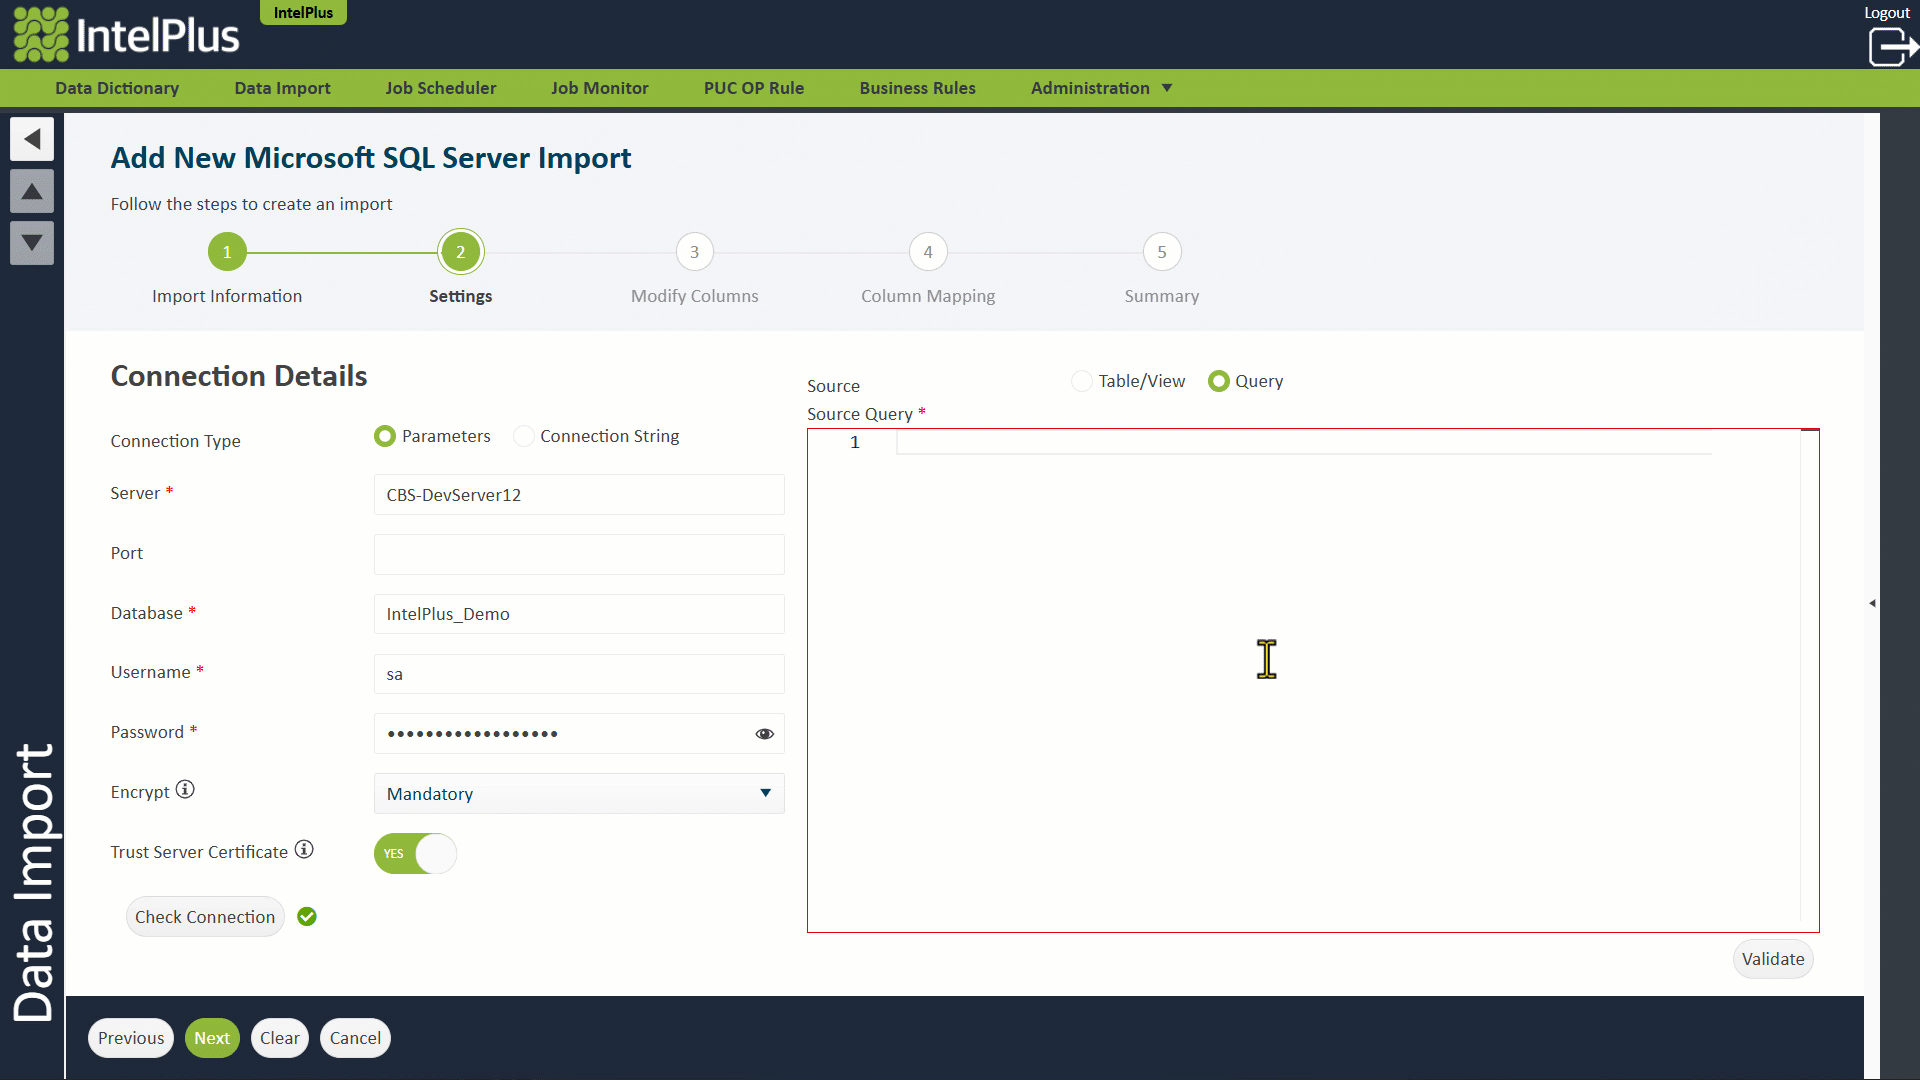
For a Database Connection:
- Connect to the source database by either:
a. Setting the connection parameters, or
b. Setting the connection string
- Click Check Connection to verify the connection is successful.
- Provide a SQL source query in the Query window and click Next.
Alternatively, toggle to Table/View, Refresh, and select the desired table or view from the drop down list (as shown below).
This will take you to Step 4 – Column Mapping.
Post your comment on this topic.